

BoldSign AI Assistant
Chat with the BoldSign AI AssistantCustom headers
Custom headers can be added to webhook requests to send additional information along with the webhook payload. This feature is useful for authentication, authorization, or including any other custom information in the webhook payload.
Types of Custom Headers
There are three types of custom headers that can be added to webhook requests:
Plain Headers
Plain custom headers are sent as plain text in the webhook request. Add the header key and value in the provided input fields.
Secret Headers
Secret custom headers are similar to plain custom headers, but the header value will be encrypted using a secret key to be stored in BoldSign. When sending the API request for the webhook, the value of the header is decrypted and sent in the webhook request. Once it is added, the value of the encrypted cannot be seen again.
Basic Authentication
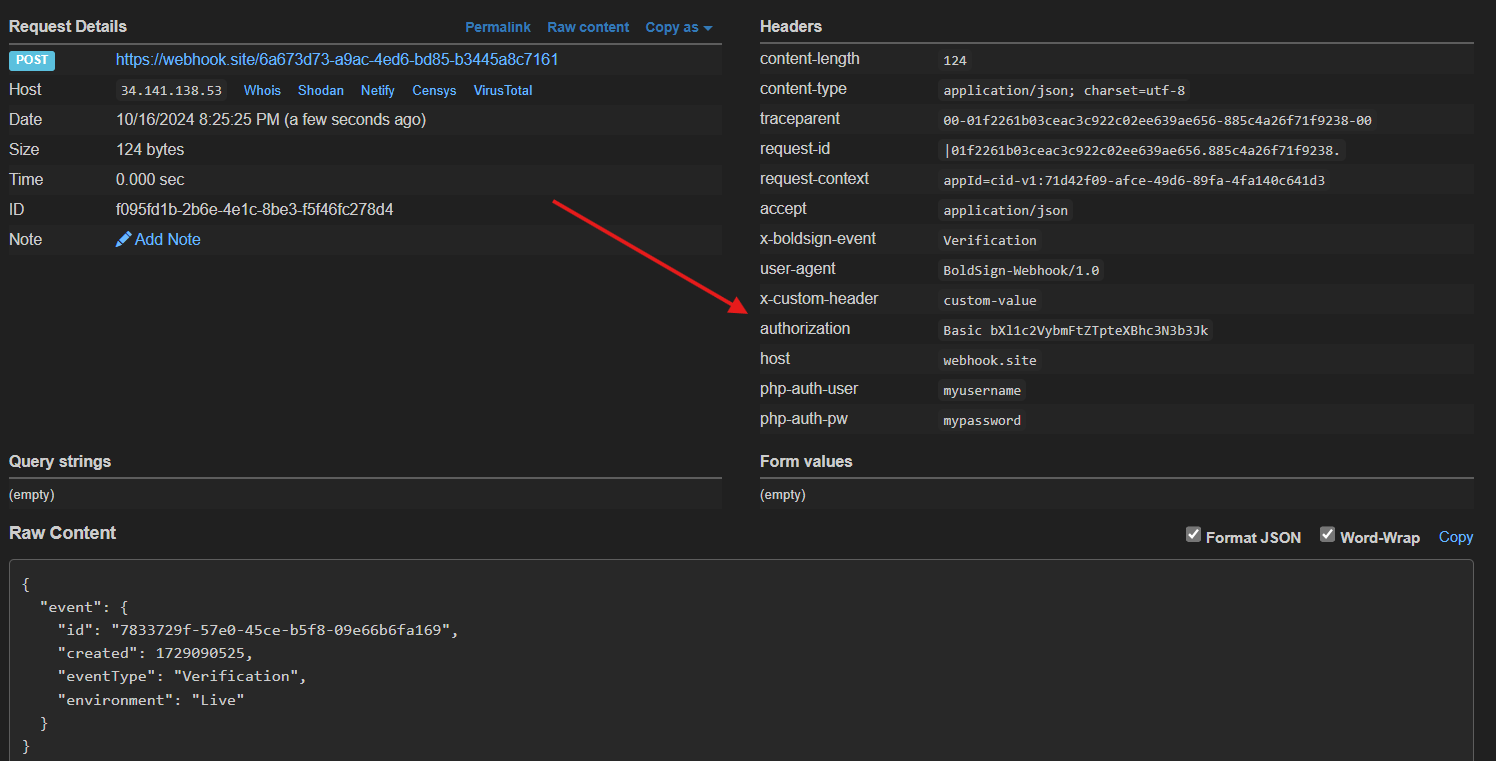
Basic authentication headers are standard HTTP headers that are used to authenticate an endpoint. The header value will be base64 encoded string of the username and password when sent in the webhook request. Only one basic auth custom header can be added per webhook.
Adding Custom Headers
Custom headers can be added in two ways:
Creating a new webhook or editing an existing one
When creating or updating a webhook, you can add custom headers at the end of the configuration process. Enter your required headers and select "Verify" to test their inclusion in the webhook request.
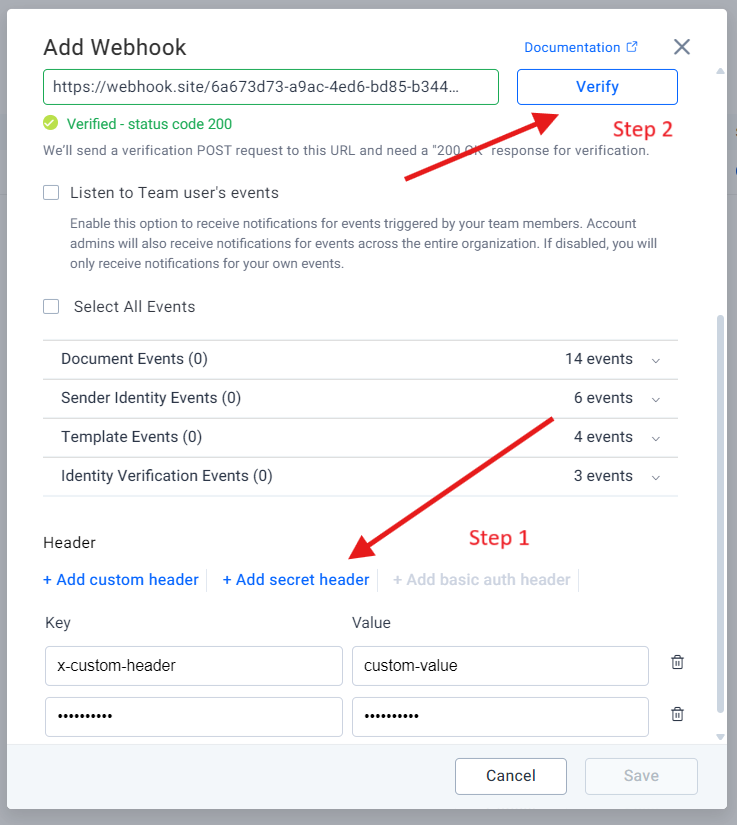
For existing webhooks, previously set header values are not displayed in the edit modal for security reasons. However, these headers are automatically included when you click "Verify".
Note that adding new headers in the modal only send them in the request and when saved it will override the existing headers with new ones.
For comprehensive header management for existing webhooks, it is recommended to use the webhook overview page (next method), where all headers are visible and can be modified as needed. This approach ensures you have full control over all custom headers configured for your webhook.
From the webhook overview page
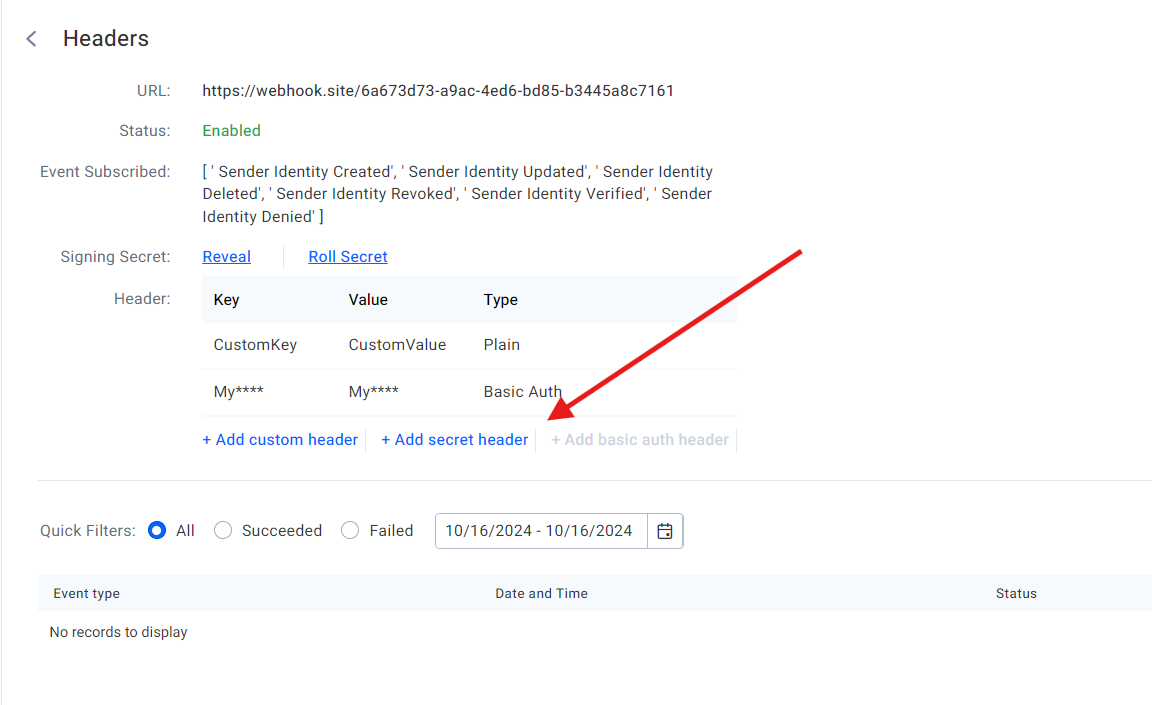
To manage custom headers for a webhook, navigate to the webhook listing and select the desired webhook. This action will display the webhook overview page. On this page, you can perform the following operations on custom headers: add new headers, modify existing ones, or remove unwanted headers. The interface provides full control over all custom headers associated with the selected webhook.
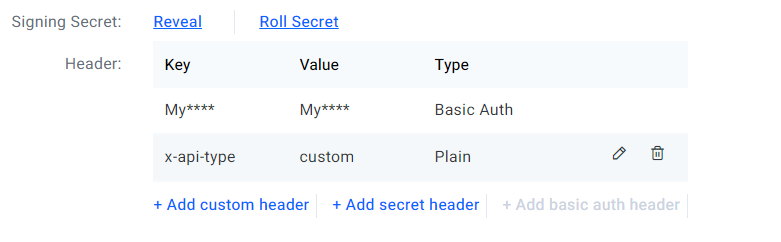
To modify or remove headers, hover over the desired header. This action will reveal options for editing or deleting the selected header.
HTTP Header Guidelines
- Use lowercase letters for header names (e.g., "x-custom-header").
- Prefix custom headers with "X-" to differentiate from standard HTTP headers (e.g., "x-api-key").
- Separate words in header key with hyphens (-).
- Avoid special characters except for hyphens (-); other characters may prevent header inclusion in the webhook request.
- Utilize secret custom headers for sensitive information.
- Keep header values brief and avoid including large data sets.
- Note that some proxy servers or firewalls may strip or modify non-standard headers, requiring handling in user server.
Restrictions
- Maximum number of custom headers per webhook: 10.
- Basic authentication: Limited to one per webhook.
- Secret values, usernames, and passwords: Not visible after addition, but can be updated.
- Custom header key length: Limited to 50 characters.
- Custom header value length: Limited to 1200 characters.